Enterprise Profiles
The Enterprise Profiles feature collects user profile data on session end and saves it to a secure disk associated with a specific Frame user (based on identity provider (IdP) address) and Frame Account. When that user logs in to a Frame session, their secure profile disk is automatically attached to the virtual machine and made available to their session. This feature allows Frame to provide seamless per-user customization without losing the management benefits of stateless instances.
If your organization's use-case requires the same user's profile be accessible across multiple Frame accounts, third-party profile solutions such as FSLogix, Liquidware ProfileUnity, or Windows roaming profiles can be used. Organizations wishing to leverage one of these third party solutions will also need to configure Domain Joined Instances and ensure that the Enterprise Profiles button in the associated accounts' Dashboards (Dashboard> Settings> Profiles) is set to None.
An Enterprise Profile cannot be shared across multiple Frame Accounts.
Requirements
Enterprise Profiles can be used in both Windows Domain Joined and non-Domain joined accounts. If an account is joined to a domain, users must log in to the Frame instance using their Active Directory credentials.
dangerWith Domain-joined Frame accounts, a single Frame user cannot log in to a Frame instance as more than one Active Directory users. Attempting to do so could result in corruption of the user profile stored in the Profile Disk. Each Frame end user is uniquely identified by the platform (a combination of the identity provider and email address). Frame end users must access their sessions using only one Active Directory user account.
The drive letters
U:andB:cannot be in use, as these drive letters are required for the backend implementation of Enterprise Profiles.Administrators must set capacity and successfully complete a publish before enabling Enterprise Profiles, regardless of whether the Frame account is configured to be domain-joined or not domain-joined.
noteEnabling Enterprise Profiles will increase the time required to establish a Frame session. When a user starts their first Frame session after Enterprise Profiles have been enabled, the time to get to that session may be increased by up to a minute; this is because their Enterprise Profile volume must be created, encrypted, and formatted on that session start. Subsequent sessions will be much faster, but still may be upwards of 10 seconds slower than sessions without Enterprise Profiles, due to timing constraints from the Cloud Provider for attaching volumes to virtual machines. This behavior is normal and expected.
Enable Enterprise Profiles
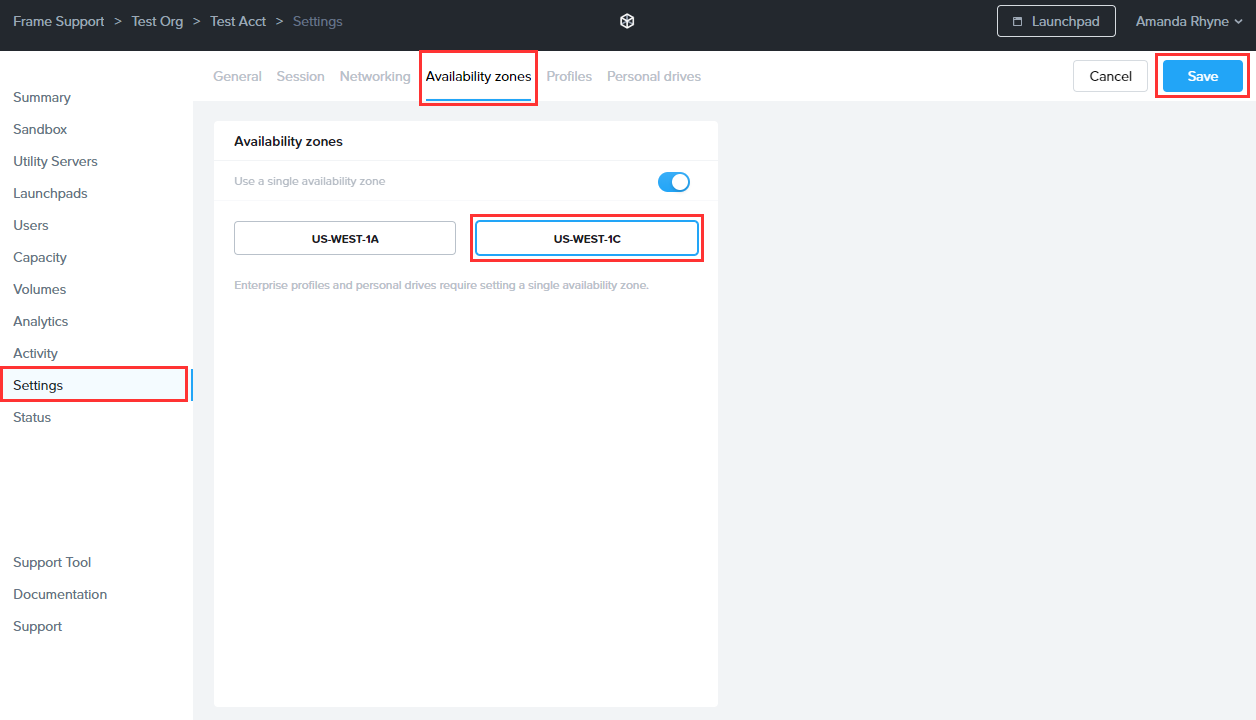
First, from the Dashboard of your account, click on the Settings page. If you are using AWS as your cloud service provider, click the Availability zones tab. If you are using a different cloud provider, continue on to step 2. Under Availability zones, enable the Use a single availability zone toggle and select your desired AZ (availability zone).
 note
noteEnterprise Profile's backend implementation through Frame varies depending on the cloud service provider. The implementation used for AWS requires administrators to specify an AZ because the Elastic Block Storage (EBS) resources must be accessible from the same availability zone as the VM pool.
cautionYou may change the Availability Zone (AZ) by selecting a different AZ and clicking on the Save button. However, this operation should be performed during a scheduled maintenance period as Frame Platform will need to terminate the EC2 instances and recreate them in a new AZ. Additionally, all enterprise profile volumes will need to be backed up and restored in the new AZ. This will take some time depending on the number of enterprise profile volumes and users whose enterprise profile volume has not been moved to the new AZ will not be able to start a session.
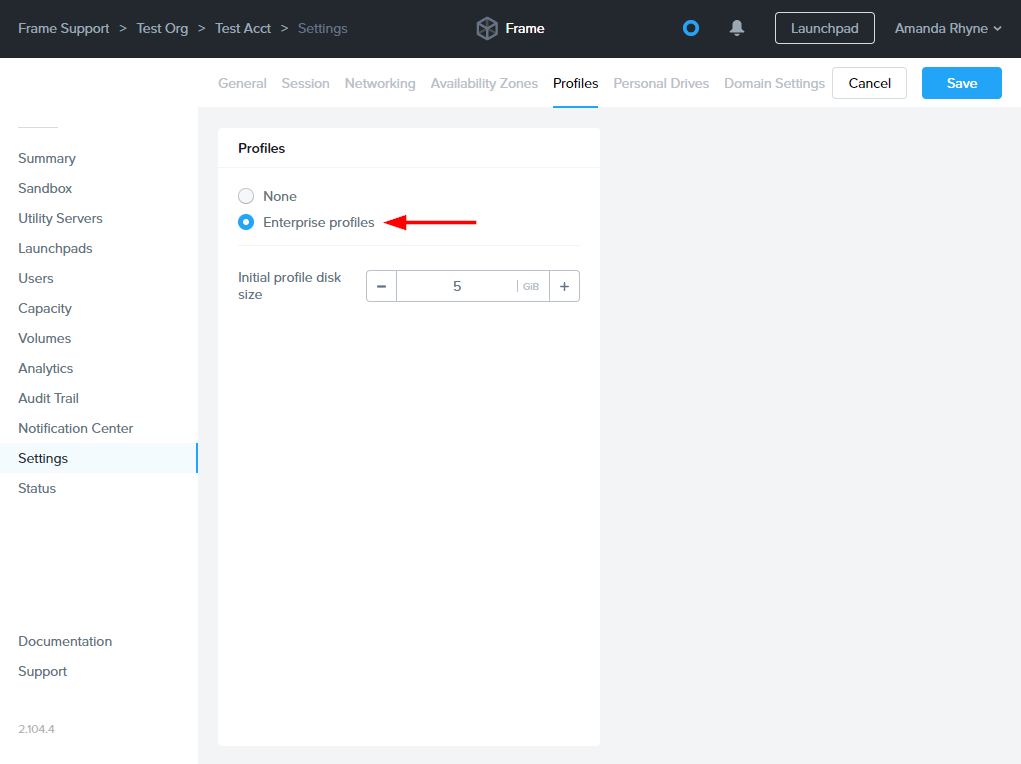
Now select the Profiles tab from the Settings page. Click on the Enterprise Profiles radio button. Set the desired Initial profile size for your users and click Save in the upper right corner.
You have successfully enabled Enterprise Profiles for your Frame account. To view and manage your Enterprise Profiles in your Frame Account, go to the Volumes page on your Frame Account Dashboard.
Disable Enterprise Profiles
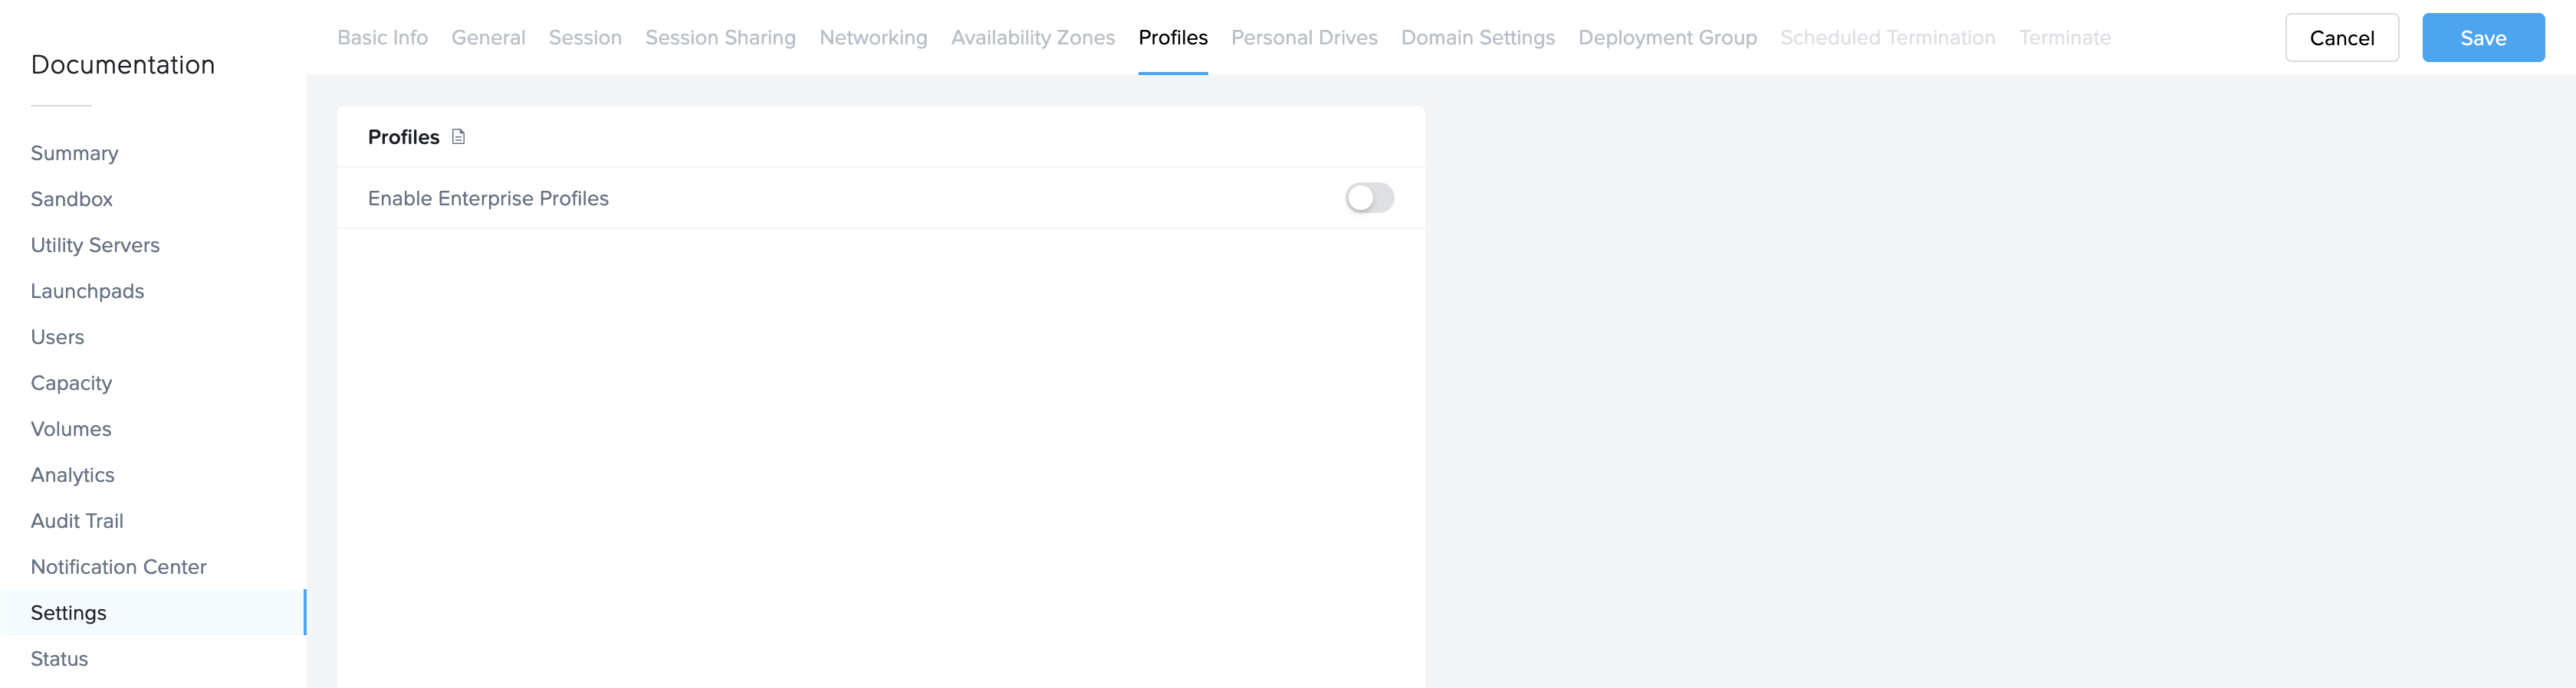
You can stop using Enterprise Profiles at any time by going to Settings > Profiles and disabling the Enable Enterprise Profiles toggle.
When you click Save, you will be asked whether you want to: (a) keep the existing profile backups or delete them and (b) create or do not create new backups of existing profiles.
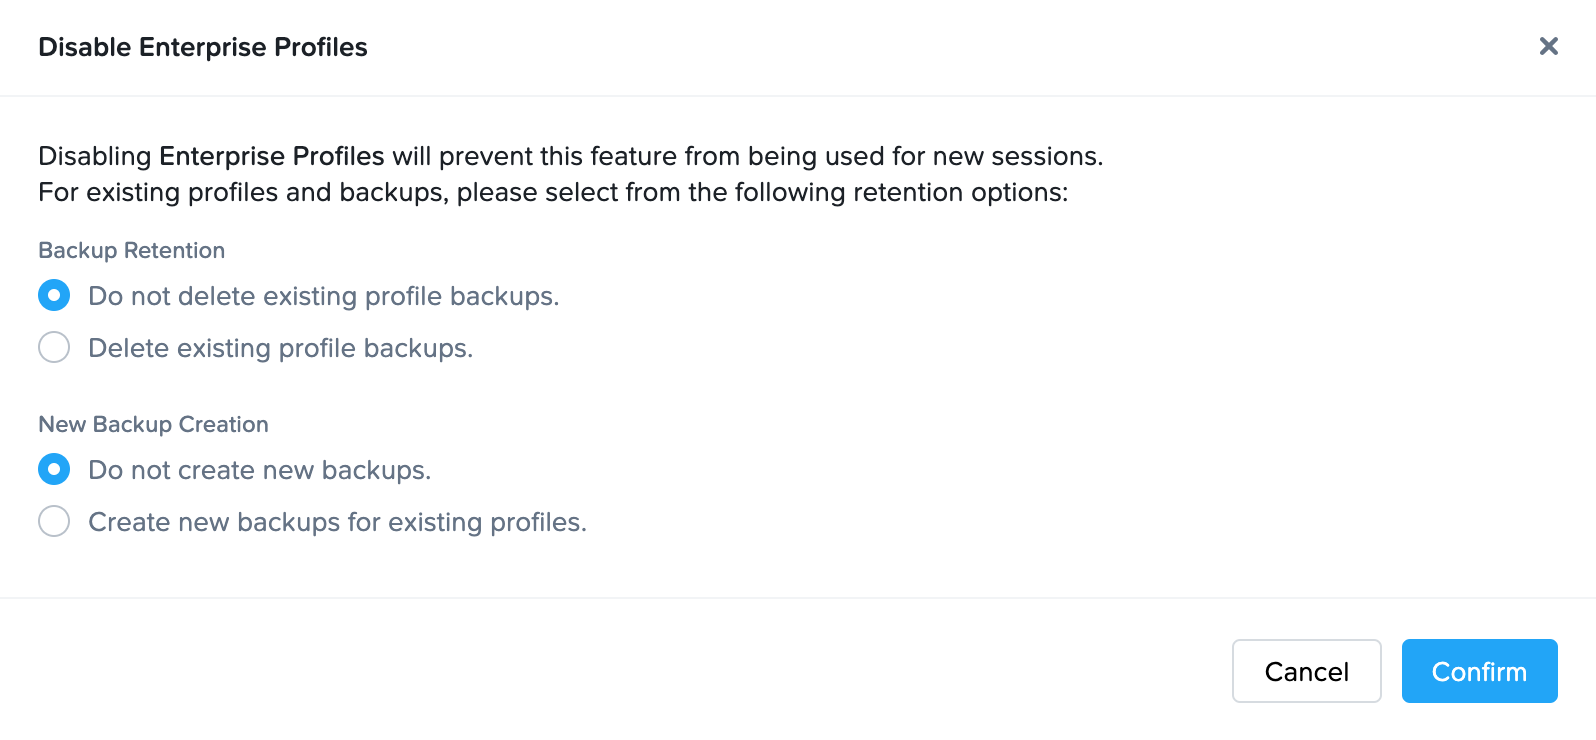
Once you click Confirm, you will be asked to verify that you wish to disable the Enterprise Profiles feature.

When you click on Confirm, Frame will keep or delete the existing profile backups, optionally make new backups for the existing profiles, and delete the existing enterprise profiles. If you select Cancel, then the Enterprise Profiles feature will remain enabled.
If you are sure that you will not use Enterprise Profiles in the future, be sure to delete all of the volume backups and do not create new profile volume backups before disabling the Enterprise Profile feature. This will prevent you from retaining any profile volume backups and incurring unnecessary storage costs.
If you wish to re-enable Enterprise Profiles and have retained the profile backups, you can selectively restore the profile backups for specific users from Volumes > Backup.
Profile Disk Location
Enterprise Profiles will persist any items that are saved in the %USERPROFILE% location. Depending on how a Frame account is configured, the user name in the path could be one of the following:
Domain-joined instances with Windows user login: Domain User (e.g.
jsmith)Domain-joined instances with Windows user login disabled:
FrameUser, a local Windows userNon-domain-joined instances:
FrameUser, a local Windows user
Adjust Storage Capacity
Administrators can make changes to the storage capacity settings, adjust their Enterprise Profiles Autogrow Settings to increase Enterprise Profile volume sizes automatically based on usage, and manually increase the volume size of specific Enterprise Profile volumes.
Initial Disk Size
The initial Enterprise Profile disk can be defined at any time by navigating to the Settings page in your Dashboard and clicking on the Profiles tab.
Simply modify the value for Initial Profile size and click Save. When a user starts a session in this Frame account and does not have an existing Enterprise Profile disk, Frame will create an Enterprise Profile disk with the disk size specified by the updated Initial Profile size value. The setting will not be applied to any users who have an existing Enterprise Profile.
Autogrow Settings
If you anticipate that your users will need to regularly increase their Enterprise Profile disk storage capacity, you can set parameters for Frame to automatically scale up as needed. To do this, navigate to the Volumes page (which will appear in your Dashboard menu once you have enabled Enterprise Profiles or Personal Drives). Under the Volumes page, click on the kebab menu and select Autogrow settings. A new dialog box will appear:
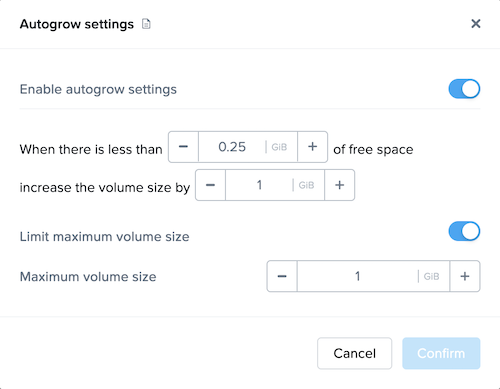
Here, you can specify the threshold at which the disk size will automatically increase for established users. By default, the disk volume will automatically be increased by 1 GB when there is less than 0.25 GB of free space remaining. You can adjust these values as you see fit for your users.
You can enforce a maximum disk volume size by enabling the Limit maximum volume size slider and setting the Maximum volume size.
Be sure to click Confirm once you have adjusted the settings as desired.
You cannot shrink the size of a user's enterprise profile disk. You must delete the disk and recreate the disk again. All data on that deleted profile disk is lost unless the profile disk contents were copied to another persistent disk before the profile disk was deleted and copied back after the new profile disk was created.
Increase Disk Size
Administrators can manually increase Enterprise Profile volume sizes in two ways:
- To increase one or more volumes, select the checkbox(es) next to the volume(s) for which you would like to increase the disk size. Click on the checkbox for for all volumes, if desired. Click the Increase disk size button in the upper right corner of the page. A dialog window will appear prompting you to specify the new disk size. Click the Save button to increase the size of the disks or Close to cancel the request.
- Click on the kebab menu associated with a specific Enterprise Profile volume and then Increase disk size to increase the disk size for a specific Enterprise Profile volume.
Delete Volumes
Administrators can delete volumes at any time. Simply navigate to the Volumes page of your Frame Account Dashboard to manage your volumes. When an administrator deletes a volume for a user, a new volume will be provisioned for that user upon the next session start. The new volume configuration will depend on the initial disk size setting at the time the session was launched. For example, if you update your “Initial Drive Size” setting to 7 GB and then delete a profile disk for a user, the user will be provisioned a new profile disk with a max storage capacity of 7 GB when they start a new session.
Please ensure that the volume status is Detached before you attempt to delete it.
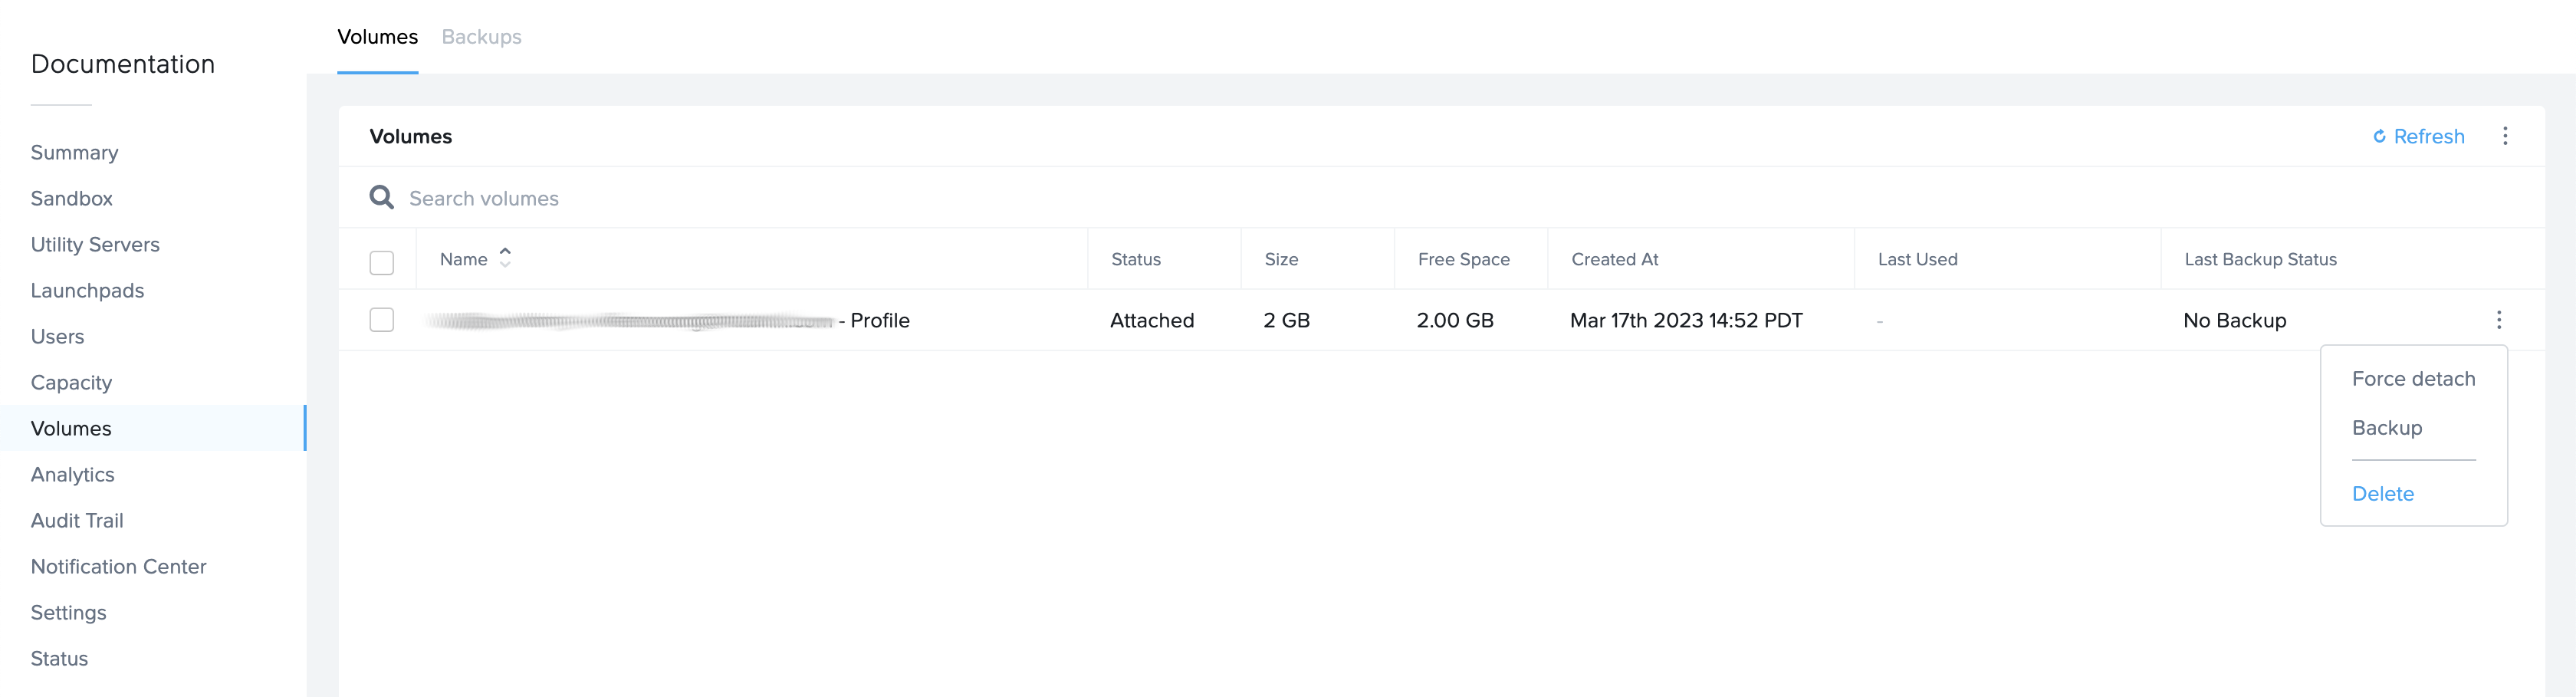
Delete a Single Volume
To delete a single volume, you can search for the volume by entering a search string in the Search volumes field. From there, click the ellipsis next to the volume you would like to delete. Click on the checkbox to delete all backups associated with the selected volume, if desired. Select Delete and confirm. You will be asked if you would like to delete all backups associated with the volume as well.
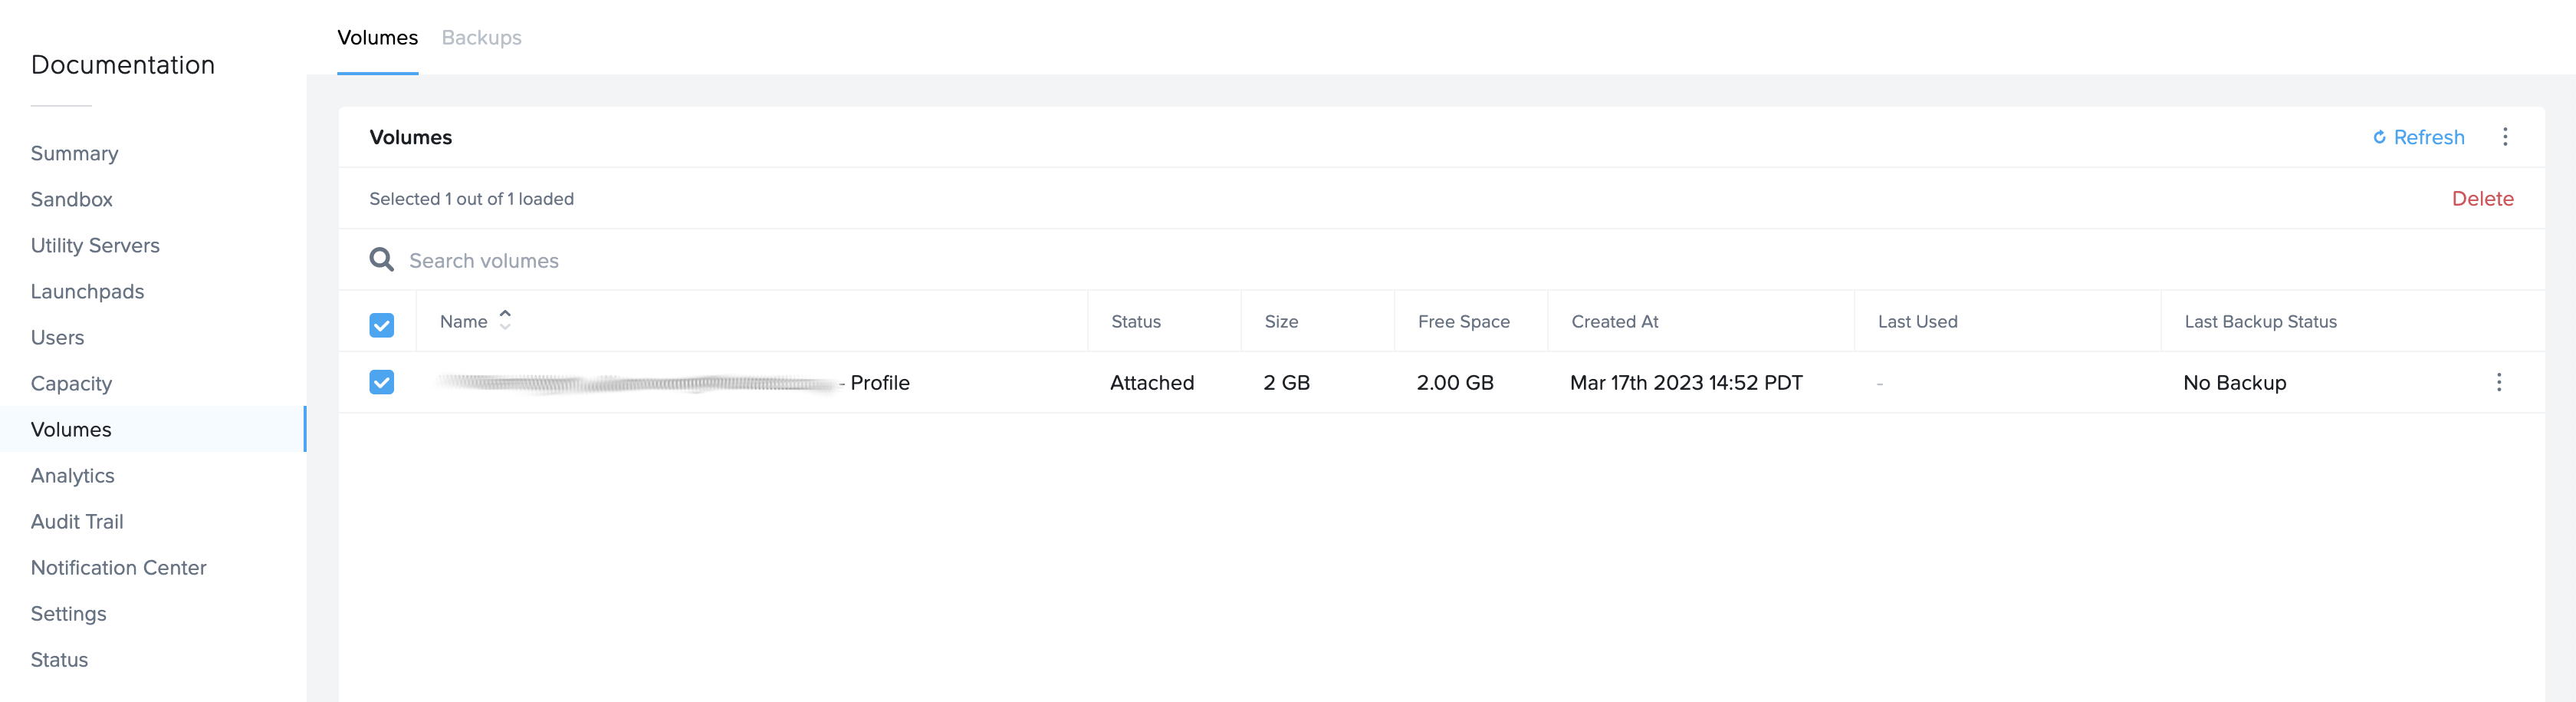
Alternatively, you can select the checkbox next to the volume you would like to delete. Click on the checkbox to delete all backups associated with the selected volume, if desired. Click on the Delete button in the upper right corner of the page and confirm.
Delete Multiple Volumes
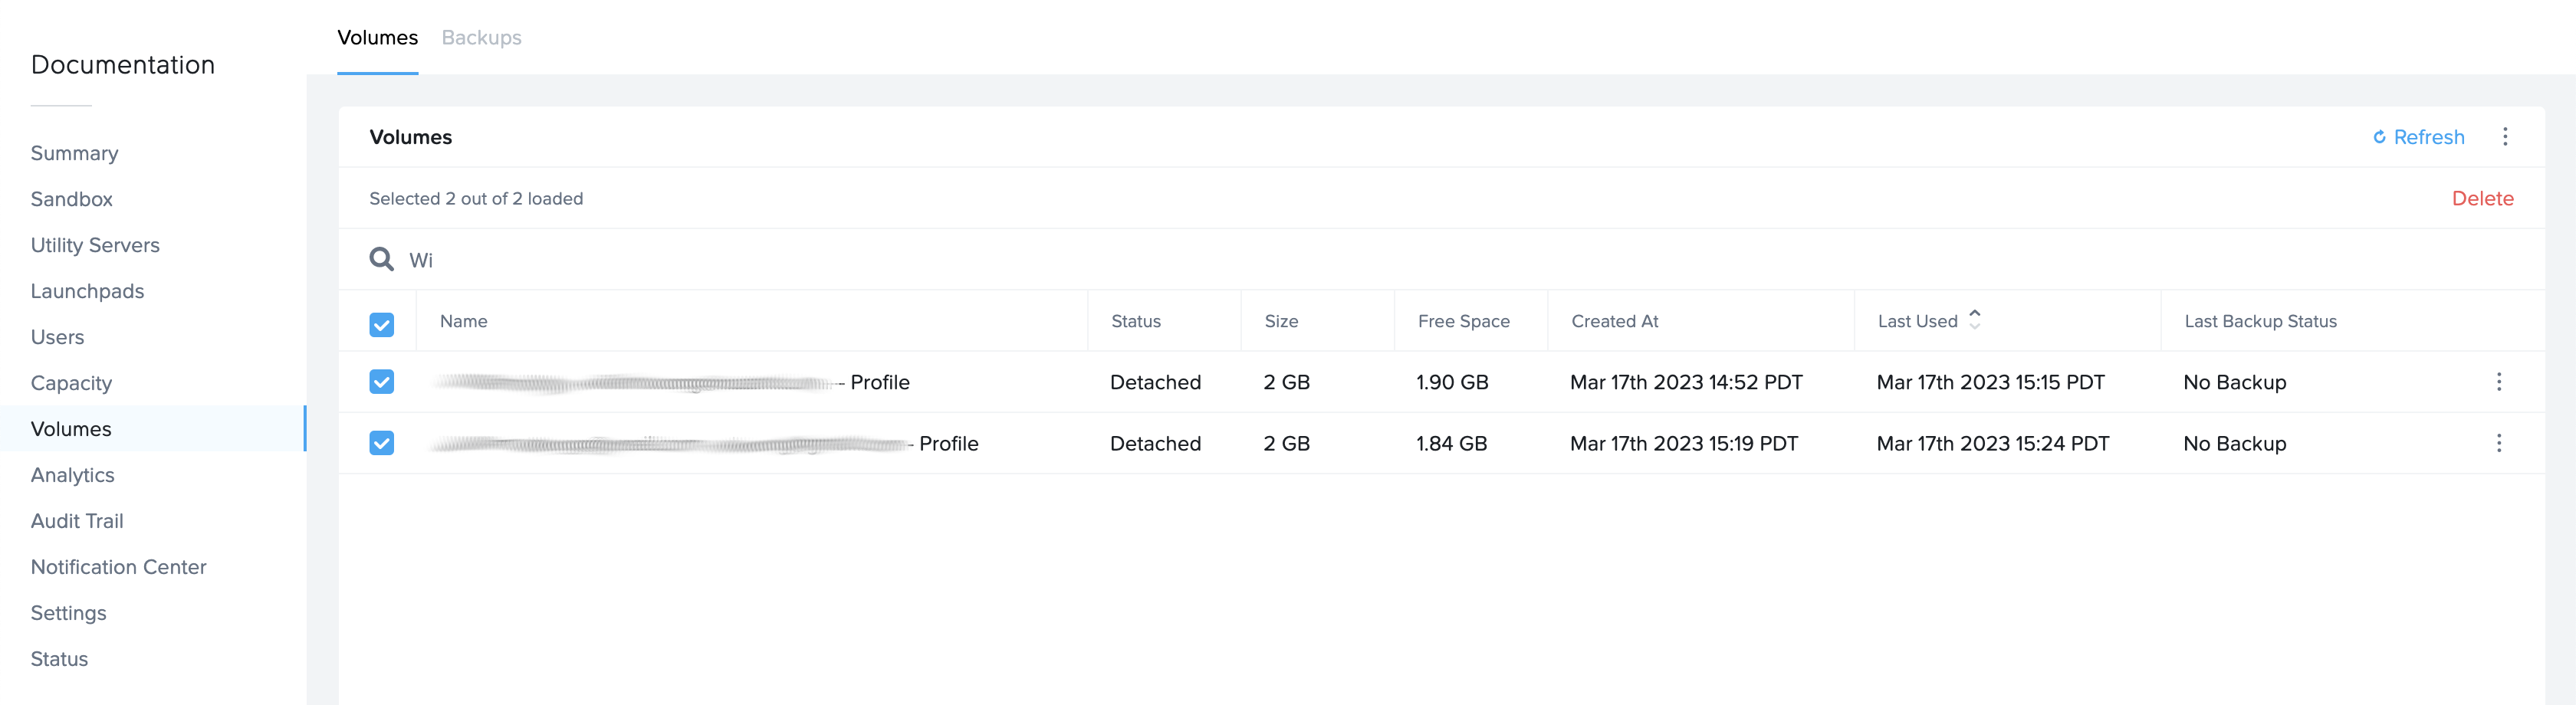
To delete one or more volumes, you can search for the volumes by entering a search string in the Search volumes field or sort the list of volumes by Last Used date/time. Then, select the checkbox(es) next to the volume(s) you would like to delete. Click on the checkbox to delete all backups associated with the selected volumes, if desired. Click the Delete button in the upper right corner of the page and confirm. You will be asked if you wish to delete all backups associated with this volume as well.
If you want to delete all of the volumes listed on your Volumes web page, click on the checkbox next to the Name field to select all of the volumes listed.
Profile Disk Exclusions/Inclusions
You may need to specify inclusions or exclusions for various paths in your environment.
Profile Disk Exclusions
Frame account administrators can exclude folders from the user's enterprise profile disk. To implement exclusion rules, Frame administrators will need to implement the rules in the form of a PowerShell script using the Add-ProfileDiskExclusion cmdlet. This capability is supported in Frame Guest Agent 8.0 or greater.
Add-ProfileDiskExclusion -SourcePath $path_to_folder_to_exclude -TargetPath $path_to_temp_folder
$path_to_folder_to_excludewould be a folder which is in%USERPROFILE%. If you have multiple folders to exclude, you can invoke the cmdlet for each of the folders.$path_to_temp_folderwould be a path to an existing temporary folder.
Profile Disk Inclusions
Frame account administrators can include folders in the user's enterprise profile disk. To implement inclusion rules, Frame administrators will need to implement the rules in the form of a PowerShell script using the Add-ProfileDiskInclusion cmdlet. This capability is supported in Frame Guest Agent 8.0 or greater.
Add-ProfileDiskInclusion -SourcePath $path_to_folder_to_include
$path_to_folder_to_includewould be a folder that is not normally in%USERPROFILE%. If you have multiple folders to include, you can invoke the cmdlet for each of the folders
Refer to Exclusion/Inclusion Rules for Enterprise Profiles to read more about how a custom pre-session script can be implemented using the cmdlets.
Manage Backups
If you would like to implement backups for your volumes, check out the Backups section of our documentation.
Troubleshooting
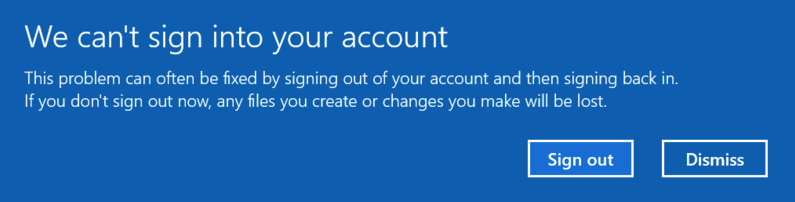
We can't sign into your account error
If a user sees this Windows message after logging into their domain and the Frame account is enabled with enterprise profiles, verify the user has not logged into their Frame sessions with more than one Windows domain user account.