Utility Servers
A Utility Server is a stand-alone, general purpose Windows server that can be helpful for a variety of use cases, including:
License server: Install a network licensing manager for your software on a Frame Utility server. Your production instances can then connect to this server to get the licenses.
Backend for a client-server application: Host a database or other backend function in the Utility server directly on your Frame account. Essentially, your entire system can be hosted in the cloud.
Shared file server: Store files that can be accessed by all of your users.
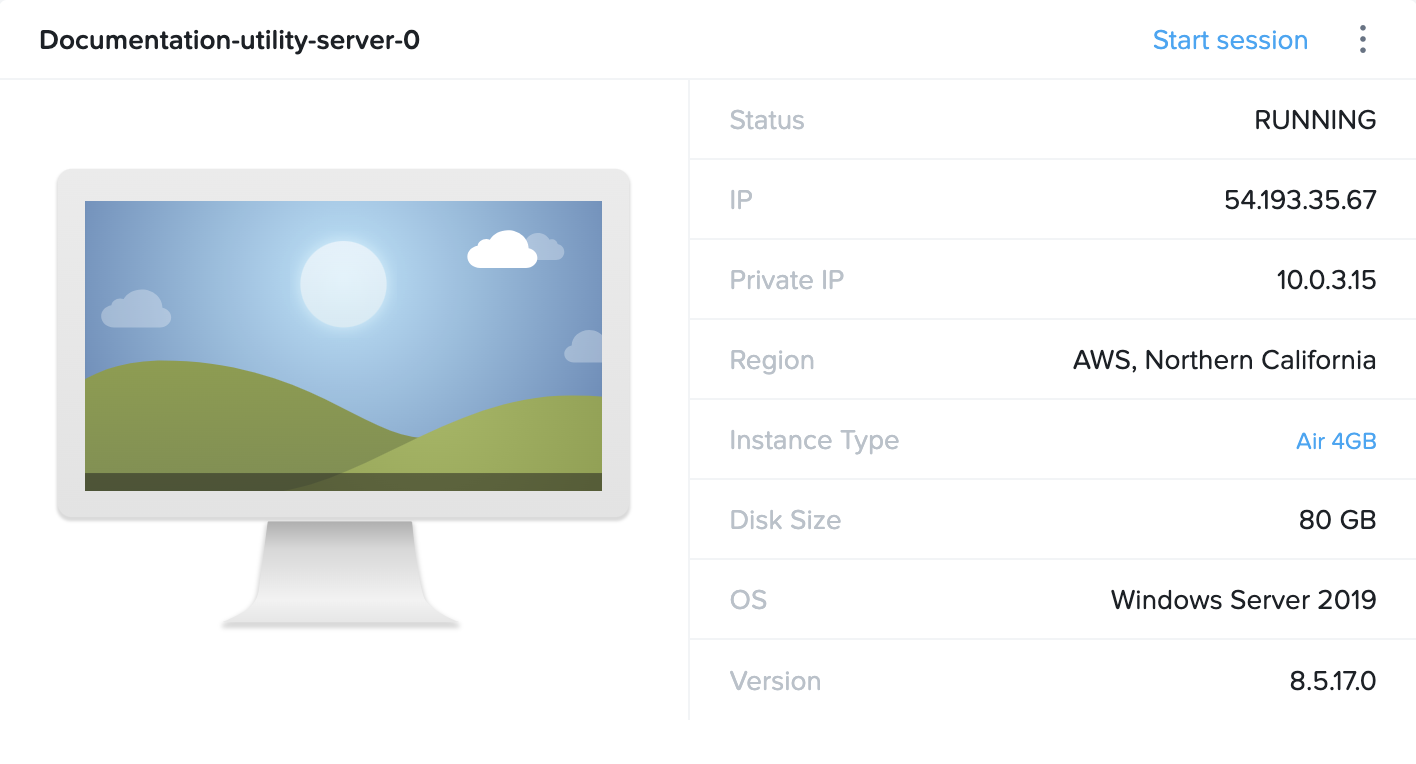
Similar to your Sandbox, the Utility server is accessed from the Frame Dashboard, where you can power it on and connect to install applications. Unlike the Sandbox, however, the Utility server will NOT power off automatically. It was designed for use cases where you need the server to run 24x7.
By default, the Utility server is configured as a relatively low-powered machine (ideal for being a license server). If you wish to use this for a database or another more demanding back-end function, you can adjust the system type from your Dashboard (we will discuss this in more detail below).
The Utility server will be available to the rest of your instances within the VPC/VNet. After setting up your Utility server, you'll need to open any necessary ports in your Utility server's Windows Firewall.
Though we typically recommend using the Utility server for client-server applications, we understand that connections to on-premises servers might be needed. Getting your application working with an established server from your own network will require one of two scenarios:
Configure your network to allow outside connections to the server. At that point, you'd configure the application to connect to whatever domain or IP address information you want to use for establishing the connection, and it should work without issue. By default, Frame doesn't restrict outbound connections from our sessions, only inbound ones.
Configure a VPN tunnel from the instances to your network. This requires the use of a VPN client that allows you to configure the traffic routing rules.
Create a new Utility Server
Creating a new Utility server is relatively simple. From your Dashboard navigate to the “Utility Servers” tab.
Click the Add Utility Server button in the center of the page. A dialog will appear giving you a number of options to configure your Utility server:
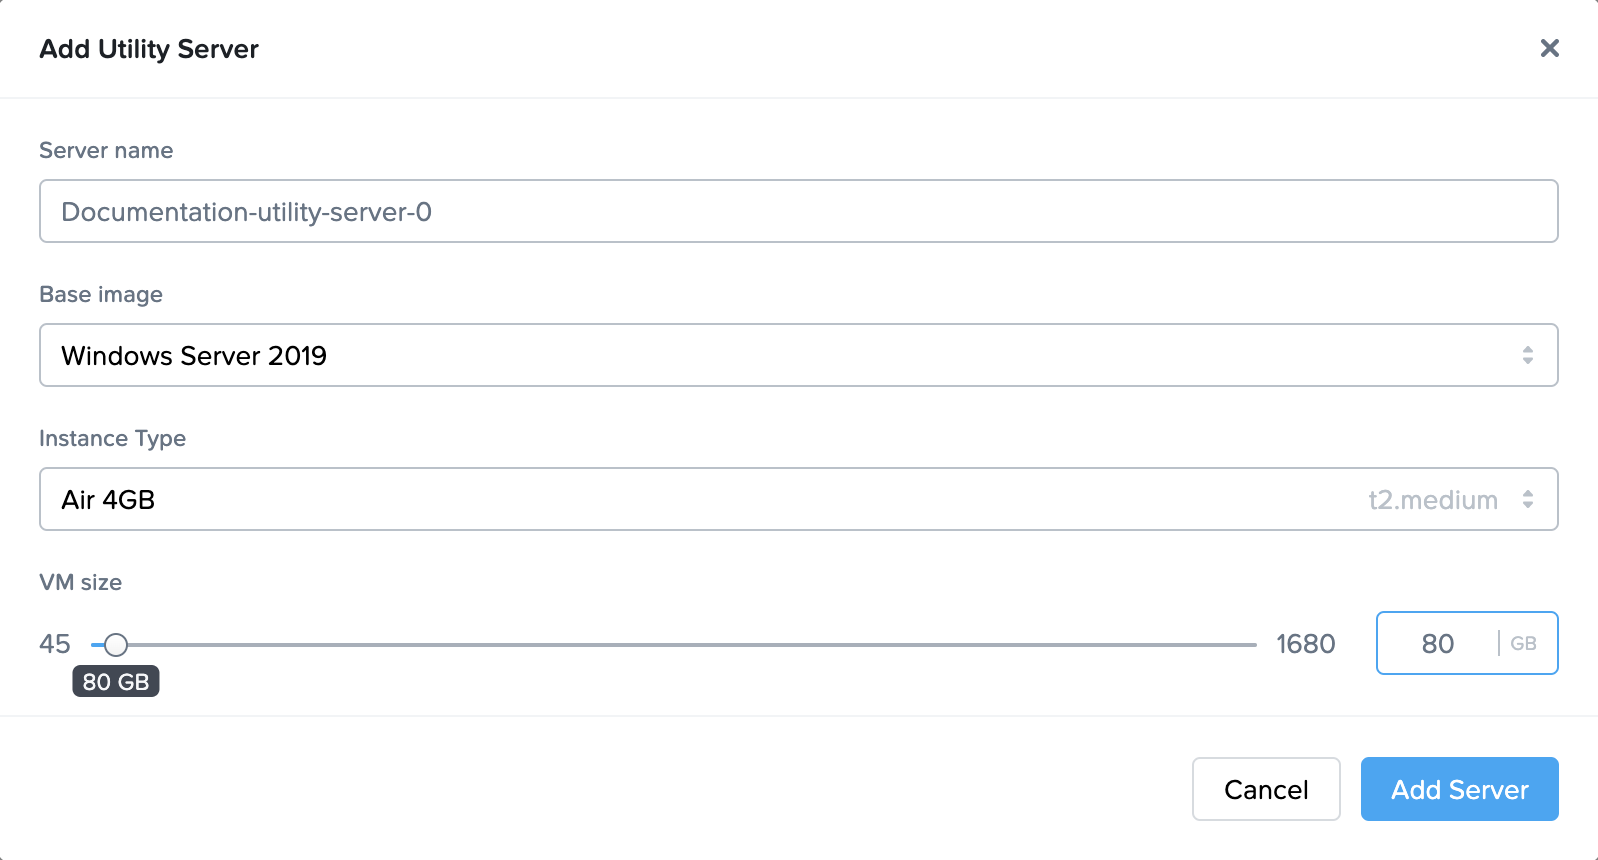
- Server name: Set the desired name for your Utility server.
- Image family: Select the image family you wish to use for your Utility server.
- VM size: Select the desired VM size based on your use case. License servers typically do fine with an Air 4GB.
- Disk size: Use the slider or the editable field next to it to select the desired disk size based on your use case. Please note that Windows will typically consume about 25 GB of storage space on its own.
Once you have configured the Utility server as desired, click Add Server to start the provisioning process.
Configuration
You can make multiple adjustments to your Utility server by clicking on the kebab menu in the upper right corner.
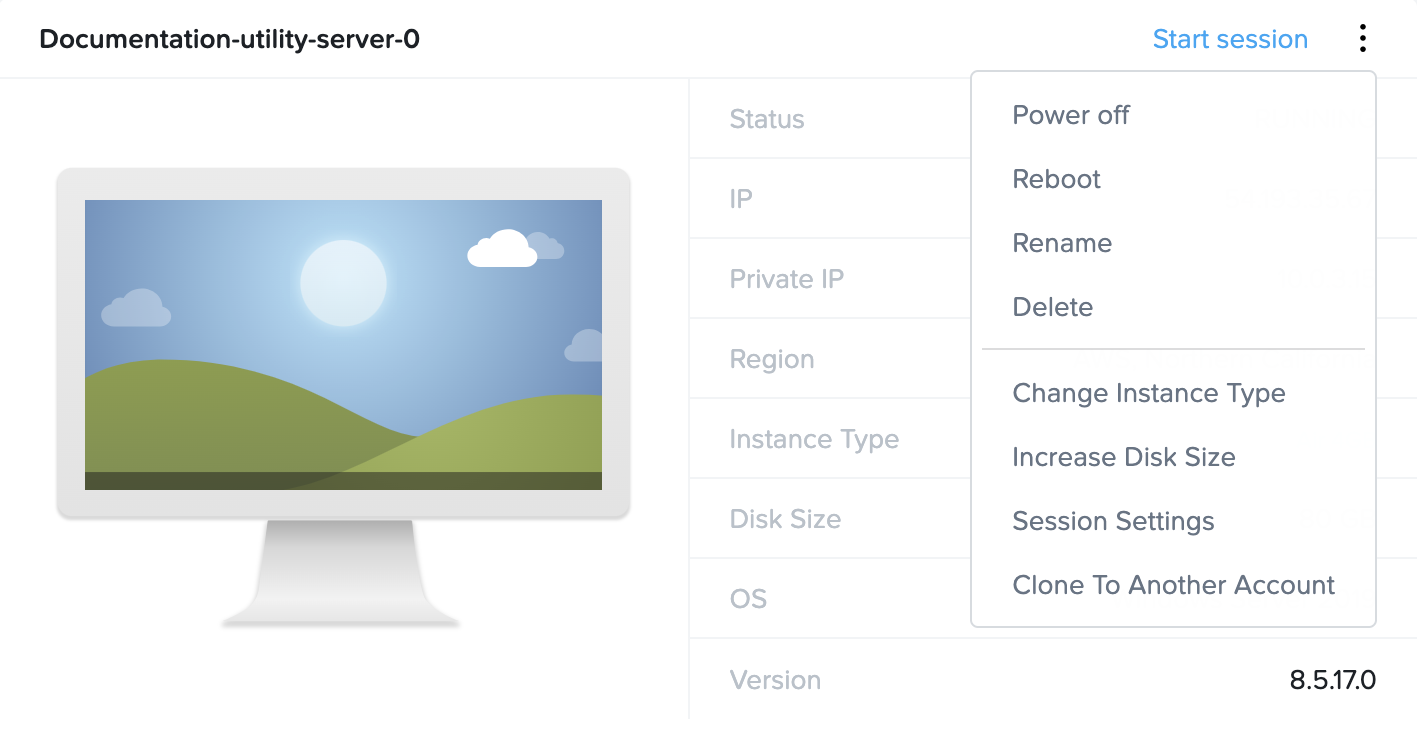
- Power Off: You can power off your Utility server from the Dashboard without having to be in a Utility server session.
- Reboot: You can reboot the Utility server from the Dashboard without having to be in a Utility server session.
- Rename: A dialog will appear prompting you to enter a new name for the Utility server.
- Delete: Deleting the Utility server will also delete any data associated with the Utility server, including backups. This action cannot be reversed and the data cannot be recovered.
- Change Instance Type: Switch between low-powered and high-powered instance types as necessary. Note that for public cloud infrastructure, changing the instance type requires the new VM to power on after the existing Utility server disk is attached to the new VM and the old VM is terminated.
- Increase Disk Size: You can increase the disk size as needed for your Utility server. Note that you cannot decrease the disk capacity once a disk increase has been implemented.
- Session Settings: Admins have the ability to configure a separate set of session settings for their Utility servers. More information about session settings is available under the Session Settings documentation page.
- Clone to Another Account: The Utility server cloning operation will clone (copy) the Utility server image from the Frame account you are on to one or more destination Frame accounts.
Backups
Utility server backups can be performed manually on demand. To learn more about Backups, visit Backups.