Microsoft Azure
This document will provide you with instructions on how to prepare and register your own template image in Azure for use with Frame. Before moving forward with the preparation procedure, please ensure you have read through the general requirements and considerations on the Windows BYO image page. We will outline additional details specific to Azure public cloud below.
Considerations
- When creating a new template image for Azure, we recommend you start with the Microsoft-provided Windows 10, Windows 11, Windows Server 2019, or Windows Server 2022 images. Community and third-party Azure Marketplace VMs have not been tested.
- We recommend using 1909, 20H1, 20H2, or 21H1 editions of Windows 10 Pro/Enterprise. Windows 10 Enterprise multi-session images are not supported.
- Azure Generation 1 and 2 VMs are supported. If you plan to use Windows 11 with vTPM, you must use Azure Generation 2 VMs.
- Limit Azure image/snapshot name to 50 characters to avoid deployment issues in Frame.
- You may bring your own image, but the procedure below assumes you have uploaded the image to Azure and verified that a Windows VM instance built using your image operates correctly in Azure.
Image Preparation
- First, starting with a Windows 10, Windows 11, Windows Server 2019, or Windows Server 2022 image, create a VM in the Azure account you are going to use for Frame. When configuring your image, you must use a Windows OS user account with local Windows administrator privileges. For Windows 11 with vTPM, deploy a trusted launch VM as discussed in the Microsoft documentation page Deploy a trusted launch VM before proceeding to Step 2.
- Use RDP to connect into your VM. Follow the Installation and Usage instructions to download the Frame Agent Setup Tool (FAST) and install the Frame Agent, drivers, and tools in your template image VM.
- Once FAST has successfully installed the Frame Agent, drivers, and tools, reboot the VM to complete the installation of the Frame Agent. Use RDP to connect back into your VM.
For additional installation scenarios (e.g., proxy server configuration, command line arguments, review our Frame Agent Setup Tool documentation.
(Optional): If a proxy server is required for all outbound traffic to the Internet from your private network, you will need to configure Frame Guest Agent to use your proxy server. Refer to our FGA Proxy Helper Tool documentation page for further details.
(Optional): If you plan to use AMD or NVIDIA GPU-based instance types in Azure, make sure you install the appropriate AMD or NVIDIA GPU drivers in your template image VM.
The following driver versions have been validated for use with Frame workload VMs. Frame cannot offer support for any other driver version or combinations. For Azure, use:
- NVIDIA driver version:
512.78 - AMD driver version:
21Q1-1
(Optional): Install your applications and finish image customization.
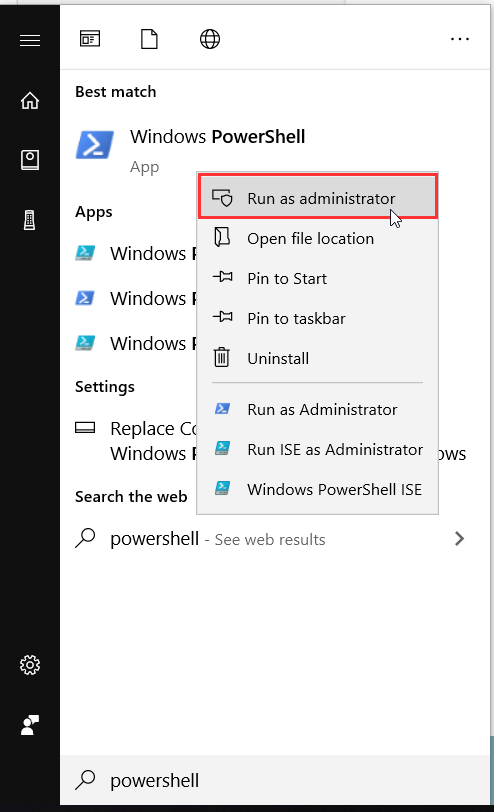
Once you have configured the image as desired, launch Powershell as an administrator.
- Run the following PowerShell command to generalize your image using Microsoft Sysprep:
Start-Process -FilePath "$env:windir\System32\Sysprep\Sysprep.exe" -ArgumentList "/oobe /shutdown /generalize /unattend:$env:programdata\Nutanix\Frame\Sysprep\Unattend.xml" -Wait -NoNewWindow
- If the VM does not shutdown, then there was a problem with sysprep. Review the sysprep logs in
%WINDIR%\System32\Sysprep\Pantherto determine the source of the error.

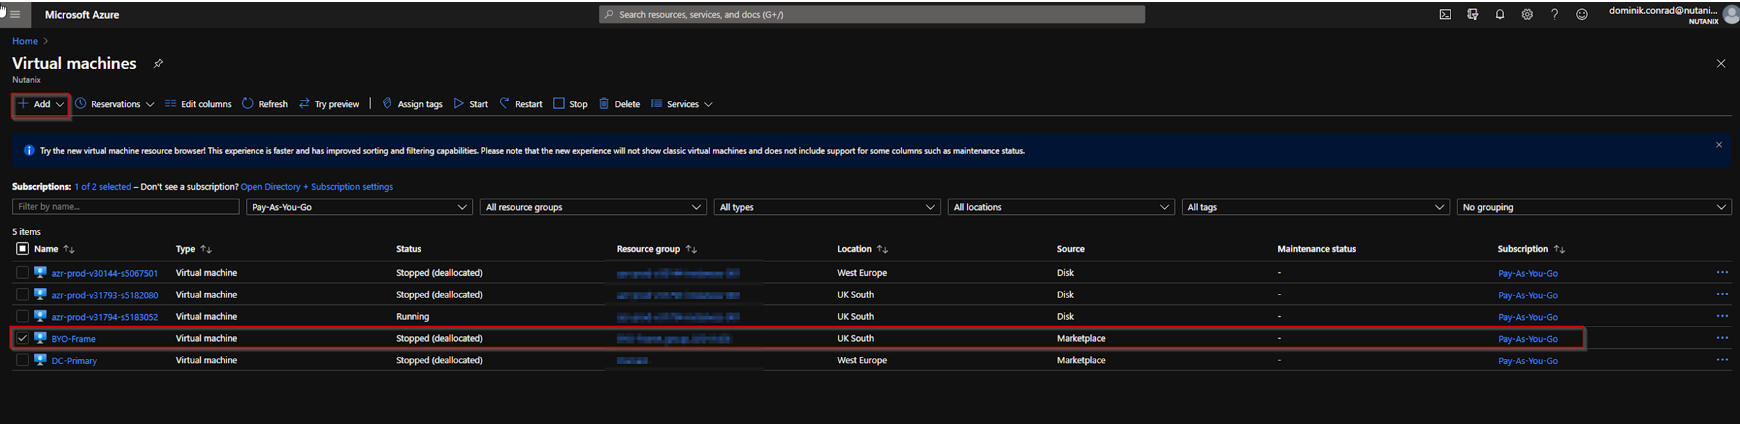
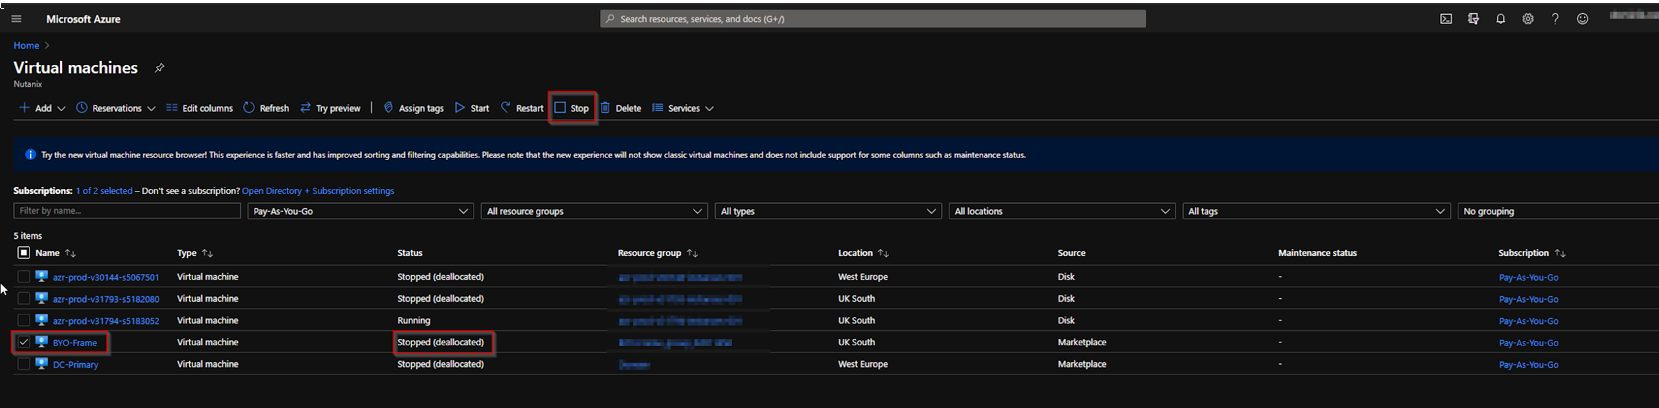
- When sysprep is successful, the VM will automatically power off. Verify that the VM has stopped in Azure Console.
Tag Snapshot
To use the template image to create VMs (e.g., Sandbox VM), you need to snapshot the VM disk you prepared and label the snapshot for Frame. Use of a snapshot eliminates the need for Azure to run sysprep again when the new VM is created from the template image.
- Navigate to the list of disks for the Azure VM.
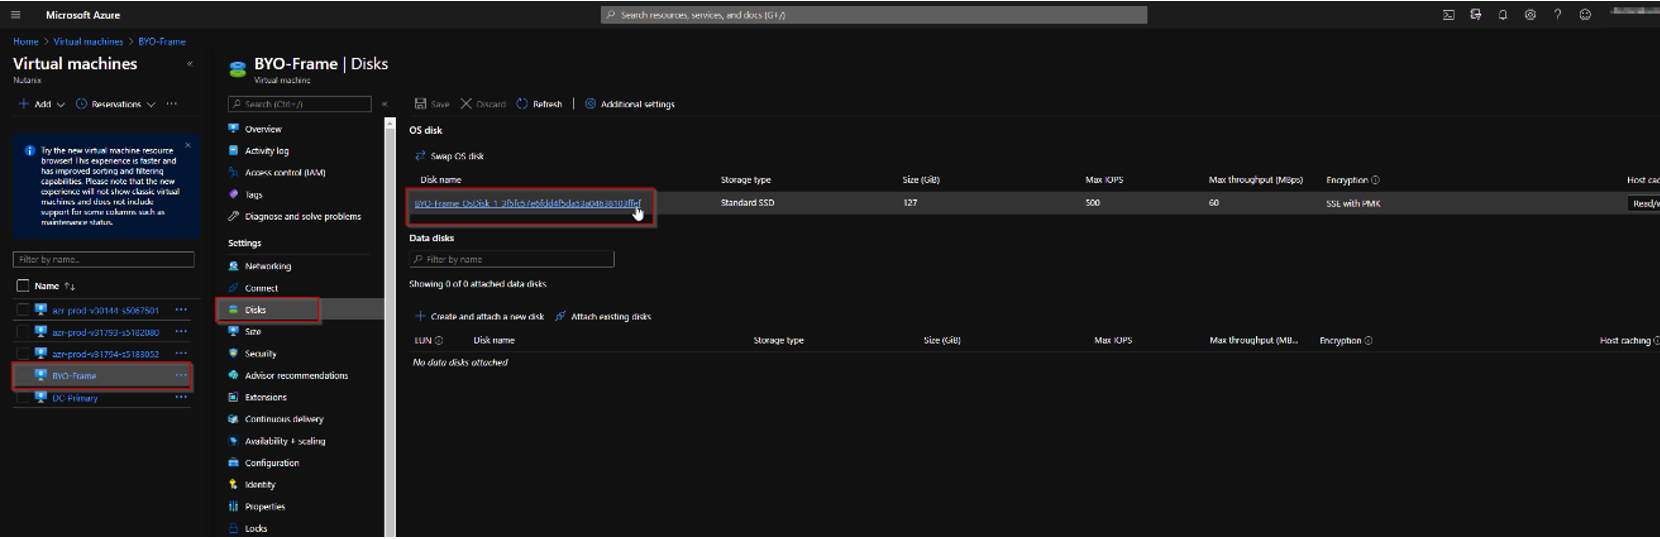
- Take a snapshot of the OS disk.
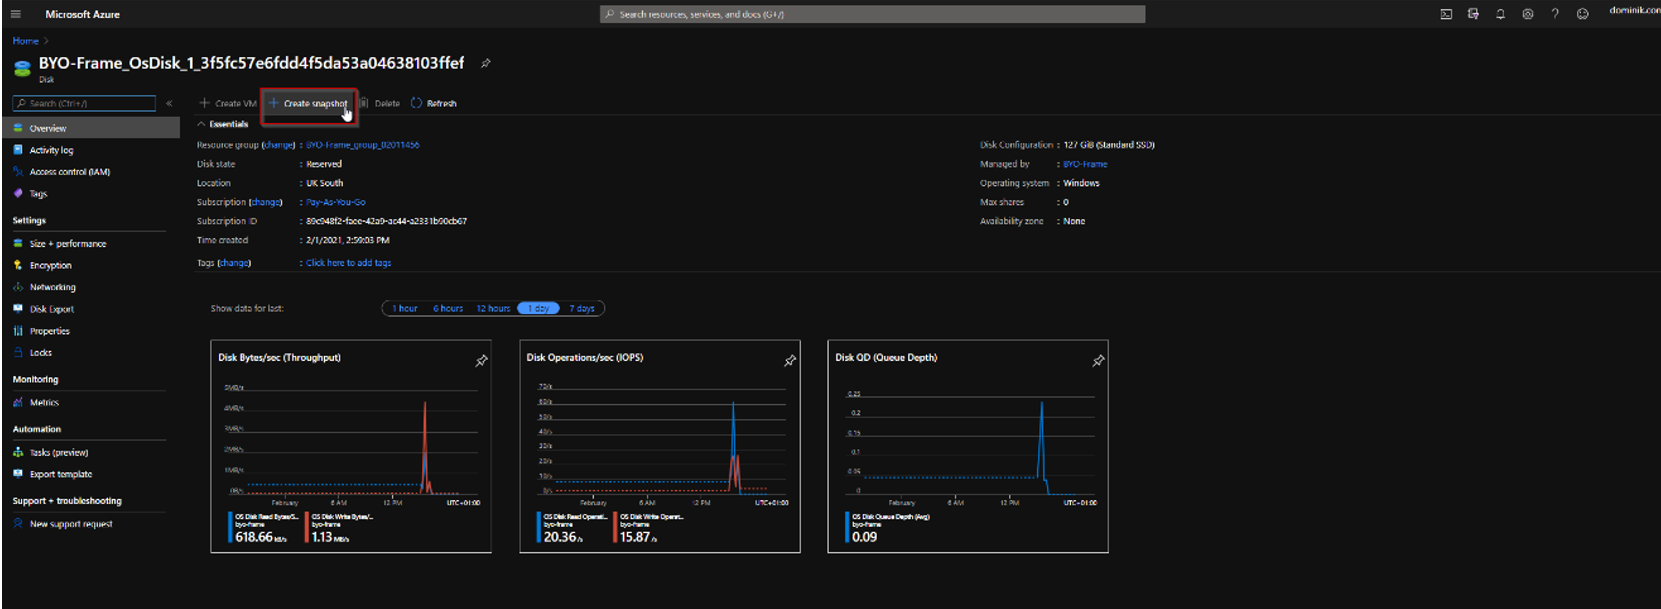
- Make sure you choose "Standard_HDD" for storage type, leave default encryption type, and select "Public endpoint" for connectivity method.

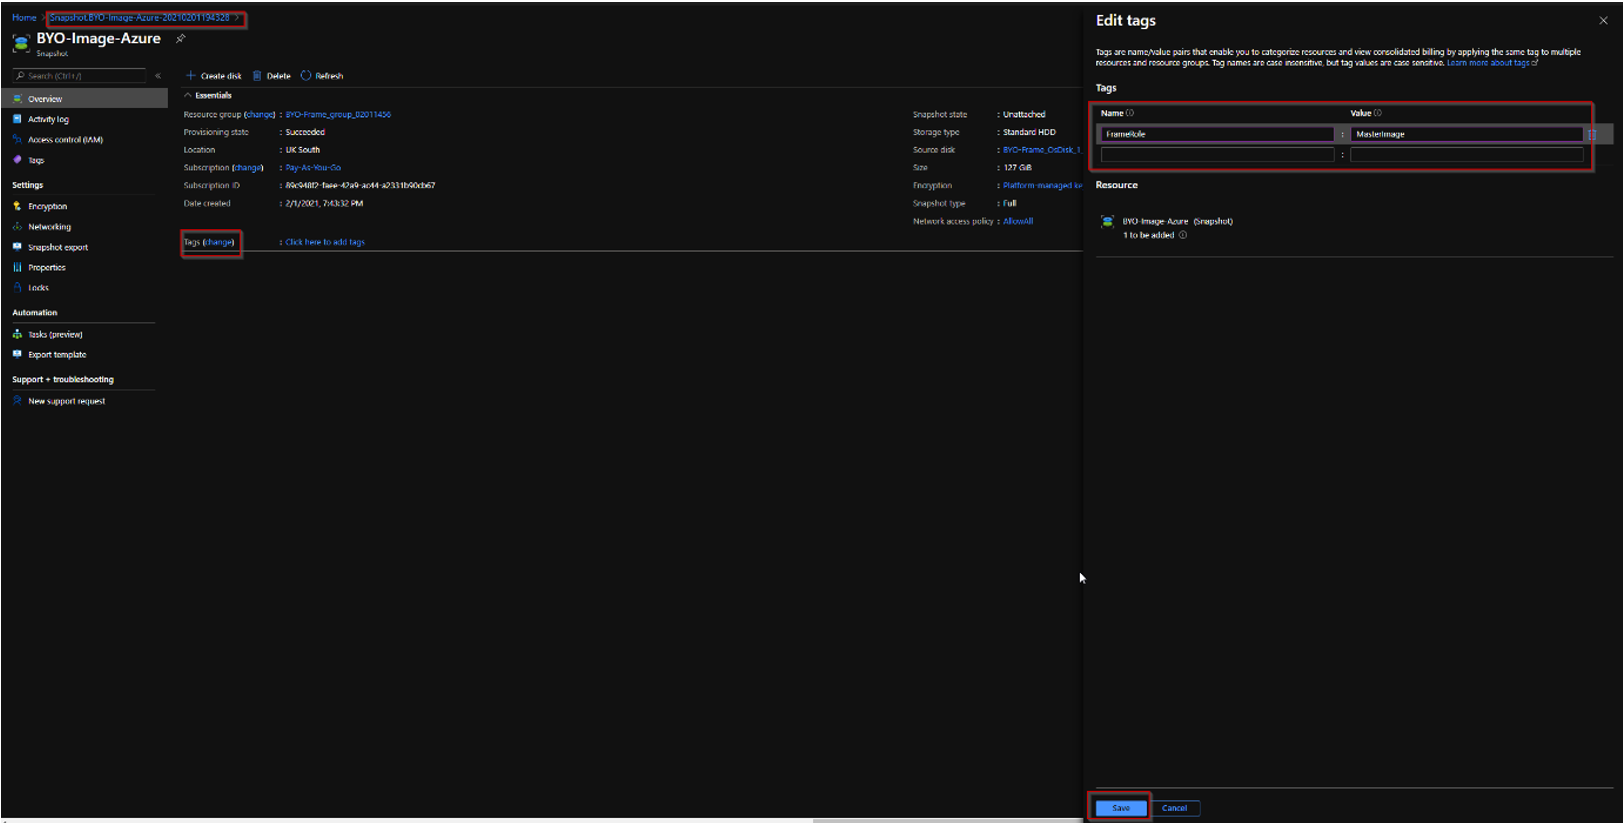
Once the image is created, navigate to the list of snapshots in the Azure Portal. Click on the snapshot you created in the previous step and assign a tag with the name
FrameRoleand the valueMasterImageto the snapshot.Assign a second tag with the name
FrameGuestAgentKindand the valuefgato the snapshot.
Voilà! You have successfully created a template image to be registered in Frame for use to create your Frame workloads. You may prepare additional template images (e.g., different Windows OS versions, template images with different sets of applications) by simply repeating the procedure with a new image.
Registration
Now it's time to register your template image in Frame. See how to do this in our Cloud Accounts > Template Images guide.